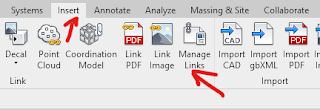
Linking a Revit file to one another is a straight forward process. It is similar to xrefing in AutoCAD.
Follow the simple steps below to effortlessly link your Revit files:

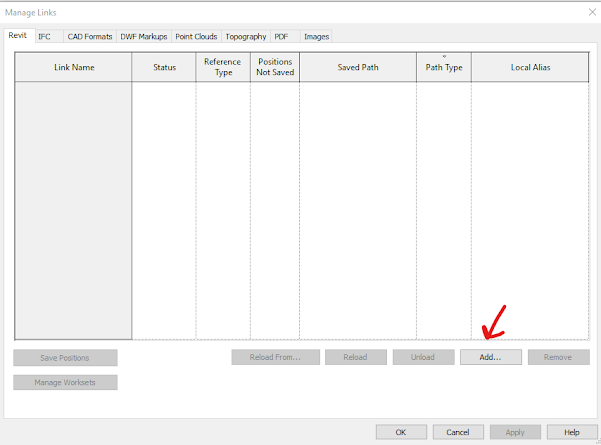
2. When the "Manage Links" dialogue window pops up select the "Add.." button to browse to the linked file location.

3. Once you located the linked file, select "Auto - Internal Origin to Internal Origin" for positioning, which is the best option most of the time. Then click "Open" to link the file.
4. Click "Ok" on the "Manage Links" window to close the dialogue box.
5. Now the linked file should be located at the origin in your model. You can type "ZF" to zoom out to display all visible objects in your model.
6. To remove the linked file, go back to the "Insert Tab" and select "Manage Links". Select the linked file within the dialogue window and click "Remove". You can also click "Unload" to remove the file temporarily if you plan on reusing it later. It will unload the file from your model but will keep the location. That would save you time from having to re-browse for the file later. You will just have to select "Reload" to reuse the linked file.
In conclusion, linking Revit files together is an intuitive process that streamlines collaboration and data management within your project. By following these simple instructions, you can easily integrate design changes from external sources across multiple models.


